Wie Trustly laut CasinosSofort das Online-Casino-Banking verändert hat
Die Art und Weise, wie Spieler Einzahlungen und Auszahlungen in Online-Casinos abwickeln, hat sich in den vergangenen fünfzehn Jahren grundlegend gewandelt. Während zu Beginn der 2000er Jahre noch Kreditkarten und klassische Banküberweisungen dominierten, hat sich das Zahlungsökosystem seither erheblich diversifiziert. Einen besonders markanten Einschnitt in dieser Entwicklung markierte der Aufstieg von Open-Banking-Zahlungsdienstleistern, allen voran Trustly. Das 2008 in Stockholm gegründete Unternehmen hat nicht nur die technische Infrastruktur für Casino-Zahlungen verändert, sondern auch das Nutzererlebnis, die regulatorischen Anforderungen und die Erwartungen der Spieler nachhaltig geprägt. Dieser Artikel beleuchtet, wie Trustly das Online-Casino-Banking konkret transformiert hat – technisch, regulatorisch und aus der Perspektive der Spieler.
Die technische Grundlage: Open Banking als Wendepunkt
Trustly basiert auf dem Prinzip des Open Bankings, also der direkten Kommunikation zwischen dem Zahlungsdienstleister und den Banksystemen der Nutzer, ohne dass eine Kreditkarte oder ein separates E-Wallet-Konto als Zwischenstation benötigt wird. Diese Architektur unterscheidet sich fundamental von älteren Zahlungsmethoden. Bei einer klassischen Kreditkartenzahlung sind typischerweise vier bis fünf Parteien involviert: der Karteninhaber, die ausgebende Bank, das Kartennetzwerk, die Händlerbank und der Händler selbst. Jede dieser Schnittstellen bedeutet potenzielle Verzögerungen, Gebühren und Sicherheitsrisiken.
Trustly reduziert diese Kette erheblich, indem es sich über standardisierte API-Schnittstellen direkt mit den Konten der Nutzer bei ihrer Hausbank verbindet. In der Praxis bedeutet das für einen Casino-Spieler: Er wählt Trustly als Zahlungsmethode, wird zu einer Oberfläche weitergeleitet, die seiner bekannten Online-Banking-Umgebung ähnelt, authentifiziert sich mit seinen gewohnten Bankdaten oder per biometrischer Methode, und die Transaktion wird nahezu in Echtzeit ausgeführt. Einzahlungen stehen in der Regel innerhalb weniger Sekunden zur Verfügung.
Ein technisch besonders relevanter Aspekt ist die Einführung der PSD2-Richtlinie (Payment Services Directive 2) durch die Europäische Union im Jahr 2018, die vollständig 2019 in Kraft trat. Diese Regulierung verpflichtete europäische Banken erstmals, ihre Schnittstellen für lizenzierte Drittanbieter zu öffnen – eine Voraussetzung, die Trustlys Geschäftsmodell nicht nur legitimierte, sondern strukturell ermöglichte. Vor PSD2 operierte Trustly in einer rechtlichen Grauzone, da der Zugang zu Bankdaten von den Instituten nicht aktiv unterstützt wurde. Nach 2019 wurde aus einem technischen Workaround ein regulatorisch abgesichertes Verfahren. Trustly war damit einer der ersten Zahlungsdienstleister, der von dieser Regulierung in großem Maßstab profitierte und seine Marktposition im Glücksspielsektor systematisch ausbaute.
Die Transaktionsgeschwindigkeit hatte unmittelbare Auswirkungen auf das Casino-Erlebnis. Frühere Methoden wie klassische SEPA-Überweisungen konnten ein bis drei Werktage in Anspruch nehmen. Für Auszahlungen war das ein erhebliches Problem: Spieler warteten mitunter eine Woche, bevor Gewinne auf ihrem Konto eingingen. Trustly ermöglichte in vielen Märkten Auszahlungen innerhalb von Minuten bis wenigen Stunden, was einen qualitativen Sprung in der Nutzerzufriedenheit darstellte.
Auswirkungen auf Identitätsverifizierung und Verantwortungsvolles Spielen
Eine der weniger diskutierten, aber strukturell bedeutsamen Veränderungen, die Trustly mit sich brachte, betrifft die Identitätsverifizierung und den Spielerschutz. Traditionelle KYC-Prozesse (Know Your Customer) in Online-Casinos waren aufwendig: Spieler mussten Ausweisdokumente hochladen, auf manuelle Prüfung warten und konnten erst nach Abschluss dieses Prozesses vollständig spielen. Die Verifizierung dauerte häufig 24 bis 72 Stunden, was insbesondere bei neuen Registrierungen zu erheblichen Abbruchraten führte.
Trustly löste dieses Problem durch sein Pay N Play-Konzept, das 2018 erstmals in Schweden eingeführt wurde. Die Idee dahinter ist elegant: Da der Spieler sich über seine Bankverbindung authentifiziert und Banken in der EU bereits umfangreiche KYC-Prüfungen ihrer Kunden durchführen, kann diese Verifikation als Grundlage für die Casino-Registrierung genutzt werden. Beim ersten Zahlungsvorgang werden grundlegende Identitätsdaten aus dem Bankprofil des Nutzers übermittelt – Name, Geburtsdatum, IBAN – und das Casino kann auf dieser Basis sofort ein verifiziertes Spielerkonto anlegen.
In Schweden, wo diese Methode nach der Marktregulierung 2019 durch die Spelinspektionen besonders verbreitet wurde, ermöglichte Pay N Play eine vollständige Registrierung und Einzahlung in unter zwei Minuten. Für den schwedischen Markt war das ein transformativer Moment: Casinos, die Pay N Play anboten, verzeichneten deutlich höhere Konversionsraten bei Neuregistrierungen als jene, die auf klassische Registrierungsformulare setzten. Branchenberichte aus dem Jahr 2020 schätzten, dass Pay N Play-Casinos in Schweden Abbruchraten bei der Registrierung um bis zu 60 Prozent reduzierten.
Gleichzeitig eröffnete die direkte Bankverbindung neue Möglichkeiten für den Spielerschutz. Da Trustly Einblick in Transaktionsmuster hat, können auffällige Verhaltensweisen – etwa ungewöhnlich häufige Einzahlungen in kurzer Zeit – theoretisch identifiziert und an Spielerschutzsysteme gemeldet werden. In Zusammenarbeit mit nationalen Sperrsystemen wie dem schwedischen Spelpaus oder dem deutschen OASIS-System können Transaktionen gesperrter Spieler in Echtzeit blockiert werden, ohne dass das Casino selbst aktiv werden muss. Das ist ein wesentlicher Fortschritt gegenüber Systemen, bei denen gesperrte Spieler lediglich auf eine Datenbank geprüft wurden, die erst nach der Einzahlung abgefragt wurde.
Wie casinos-sofort.com/ zeigt, hat sich der Markt für schnelle Zahlungsmethoden in deutschsprachigen Ländern in den vergangenen Jahren deutlich verändert, wobei Trustly neben anderen Sofortüberweisungsanbietern zu den meistgenutzten Optionen zählt. Diese Entwicklung spiegelt das wachsende Vertrauen der Spieler in bankbasierte Zahlungslösungen wider, die keine separate Kontoregistrierung erfordern.
Regulatorische Herausforderungen und Marktanpassungen in Deutschland und Österreich
Die Situation in Deutschland verdient besondere Aufmerksamkeit, da der deutsche Glücksspielmarkt eine der komplexesten Regulierungshistorien in Europa aufweist. Bis zur Einführung des Glücksspielstaatsvertrags 2021 (GlüStV 2021) existierte kein funktionierender legaler Markt für Online-Casinos auf Bundesebene. Die meisten Anbieter operierten auf Basis ausländischer Lizenzen – häufig aus Malta oder Gibraltar – in einem rechtlichen Graubereich. Trustly war in diesem Umfeld dennoch weit verbreitet, da es als Zahlungsdienstleister selbst nicht direkt reguliert wurde und die Verantwortung für die Lizenzierung beim Casino lag.
Mit dem GlüStV 2021 und der Einführung des regulierten deutschen Marktes durch die Gemeinsame Glücksspielbehörde der Länder (GGL) änderte sich die Situation grundlegend. Lizenzierte Casinos müssen nun unter anderem ein monatliches Einzahlungslimit von 1.000 Euro pro Spieler einhalten, Echtzeit-Sperrdatenbankabfragen über OASIS durchführen und strenge Anforderungen an die Spielerverifizierung erfüllen. Trustly musste seine technische Integration entsprechend anpassen, um diese Anforderungen nahtlos zu unterstützen.
Besonders die OASIS-Anbindung stellte eine technische Herausforderung dar. Das System erfordert, dass jede Einzahlung mit einer Abfrage der nationalen Sperrdatenbank verbunden ist, bevor die Transaktion freigegeben wird. Da Trustly-Zahlungen in Echtzeit erfolgen, musste diese Abfrage in den Zahlungsfluss integriert werden, ohne die Transaktionsgeschwindigkeit wesentlich zu beeinträchtigen. Die Lösung lag in der parallelen Verarbeitung: Während die Bankverbindung aufgebaut wird, erfolgt gleichzeitig die OASIS-Abfrage, sodass die Gesamtdauer der Transaktion kaum verlängert wird.
In Österreich ist die Situation strukturell anders. Österreich verfügt über ein staatliches Glücksspielmonopol, das im Glücksspielgesetz verankert ist und private Online-Casinos grundsätzlich ausschließt. Dennoch nutzen österreichische Spieler faktisch ausländische Plattformen, und Trustly ist dort ebenfalls verbreitet. Die österreichische Finanzmarktaufsicht (FMA) hat in den vergangenen Jahren mehrfach Warnungen gegen nicht lizenzierte Anbieter ausgesprochen, ohne dass dies die Verbreitung von Trustly als Zahlungsmethode wesentlich eingeschränkt hätte. Für Trustly selbst ist die Situation unproblematisch, da das Unternehmen als regulierter Zahlungsdienstleister agiert und die Verantwortung für die Glücksspiellizenzierung beim jeweiligen Casino liegt.
Ein weiterer regulatorischer Aspekt betrifft die Geldwäscheprävention. Trustly unterliegt als lizenzierter Zahlungsdienstleister den Anforderungen der EU-Geldwäscherichtlinien (zuletzt die 6. AMLD aus dem Jahr 2021) und muss verdächtige Transaktionen an die zuständigen Behörden melden. Da alle Trustly-Transaktionen direkt mit verifizierten Bankkonten verknüpft sind, ist die Rückverfolgbarkeit von Zahlungsströmen erheblich einfacher als bei Kryptowährungen oder anonymen Prepaid-Karten. Für Regulierungsbehörden ist das ein wesentlicher Vorteil: Die Transparenz des Systems erleichtert die Aufsicht über Geldflüsse im Glücksspielsektor.
Wettbewerb, Marktdynamik und die Zukunft des Casino-Bankings
Trustlys Erfolg hat erwartungsgemäß Nachahmer und Konkurrenten hervorgebracht. Im deutschsprachigen Raum ist Sofortüberweisung (heute Teil von Klarna) ein direkter Wettbewerber, der ebenfalls auf dem Prinzip der direkten Bankverbindung basiert und bereits vor Trustly im Markt etabliert war. Der wesentliche Unterschied liegt in der technischen Umsetzung: Sofortüberweisung nutzt traditionell die Zugangsdaten des Nutzers für das Online-Banking, während Trustly nach der PSD2-Implementierung auf standardisierte API-Verbindungen umgestellt hat, was als sicherere Methode gilt.
Im skandinavischen Raum, wo Trustly seinen Ursprung hat, dominiert das Unternehmen den Markt für Online-Casino-Zahlungen. In Schweden, Finnland und Norwegen ist Trustly bei lizenzierten Casinos faktisch zur Standardzahlungsmethode geworden. In Deutschland und Österreich ist die Marktdurchdringung geringer, aber wachsend. Laut Branchenschätzungen aus dem Jahr 2022 nutzen in Deutschland rund 30 bis 40 Prozent der Online-Casino-Spieler Trustly oder ähnliche bankbasierte Zahlungsmethoden, während Kreditkarten aufgrund der seit 2020 in vielen Ländern eingeführten Einschränkungen für Glücksspielzahlungen an Bedeutung verloren haben.
Die Einschränkung von Kreditkartenzahlungen für Glücksspiel ist ein wichtiger Kontextfaktor. Das Vereinigte Königreich verbot Kreditkartenzahlungen für Online-Glücksspiele im April 2020 vollständig. Andere europäische Länder folgten mit ähnlichen Maßnahmen oder diskutieren entsprechende Regelungen. Diese Entwicklung hat den Marktanteil bankbasierter Zahlungsmethoden wie Trustly strukturell gestärkt, da sie eine der wenigen verbliebenen Alternativen darstellen, die sowohl schnell als auch regulatorisch akzeptiert sind.
Parallel dazu entwickelt Trustly sein Produktportfolio weiter. Mit Trustly Instant Payments, das auf dem europäischen SEPA Instant Credit Transfer-Standard basiert, bietet das Unternehmen seit 2022 in mehreren Märkten Auszahlungen an, die innerhalb von zehn Sekunden auf dem Konto des Empfängers verfügbar sind – rund um die Uhr, auch an Wochenenden und Feiertagen. Das ist eine direkte Reaktion auf die Nachfrage nach sofortigen Auszahlungen, die CasinosSofort und ähnliche Bewertungsplattformen als eines der wichtigsten Kriterien für Spielerzufriedenheit identifiziert haben.
Ein weiterer Entwicklungstrend ist die Integration von Trustly in mobile Zahlungsökosysteme. Da ein wachsender Anteil der Casino-Nutzer über Smartphones spielt – Schätzungen zufolge waren es 2023 in Europa bereits über 60 Prozent – ist die nahtlose Integration in mobile Banking-Apps entscheidend. Trustly hat seine Schnittstellen entsprechend optimiert und ermöglicht in vielen Ländern die Authentifizierung über biometrische Methoden wie Face ID oder Fingerabdruckscan, ohne dass der Nutzer sein Online-Banking-Passwort eingeben muss. Das verbessert nicht nur die Benutzerfreundlichkeit, sondern auch die Sicherheit, da Phishing-Angriffe auf Passwörter ins Leere laufen.
Auch die Frage der Gebühren ist relevant. Trustly erhebt seine Gebühren in der Regel beim Casino, nicht beim Spieler. Die konkreten Konditionen variieren je nach Volumen und Vertrag, liegen aber typischerweise zwischen 0,5 und 2 Prozent des Transaktionsbetrags zuzüglich einer Fixgebühr. Für Casinos ist das im Vergleich zu Kreditkartengebühren von 1,5 bis 3 Prozent oft günstiger, insbesondere bei höheren Transaktionsvolumina. Dieser wirtschaftliche Anreiz hat dazu beigetragen, dass Casinos Trustly aktiv bewerben und als bevorzugte Zahlungsmethode positionieren.
Zusammenfassend lässt sich sagen, dass Trustly das Online-Casino-Banking nicht durch eine einzelne Innovation verändert hat, sondern durch die Kombination mehrerer Faktoren: eine technische Infrastruktur, die auf direkten Bankverbindungen basiert, ein regulatorisches Umfeld, das durch PSD2 erst ermöglicht wurde, und ein Nutzererlebnis, das Geschwindigkeit, Sicherheit und Einfachheit vereint. Die Einführung von Pay N Play, die Integration in nationale Spielerschutzsysteme und die Anpassung an unterschiedliche regulatorische Anforderungen in verschiedenen europäischen Märkten zeigen, dass Trustly nicht nur eine Zahlungsmethode ist, sondern ein strukturelles Element des modernen Online-Glücksspiels geworden ist. Für Spieler in Deutschland, Österreich und der Schweiz bedeutet das konkret: schnellere Transaktionen, weniger bürokratischer Aufwand bei der Registrierung und ein höheres Maß an Transparenz gegenüber Regulierungsbehörden – Entwicklungen, die den Markt langfristig prägen werden.
trên Powershell
					Windows PowerShell
Copyright (C) Microsoft Corporation. All rights reserved.

# confirm network adapter names
PS C:\Users\Administrator> Get-NetAdapter

Name                      InterfaceDescription                    ifIndex Status       MacAddress             LinkSpeed
----                      --------------------                    ------- ------       ----------             ---------
Ethernet0                 Intel(R) 82574L Gigabit Network Conn...       6 Up           00-0C-29-C7-54-1A         1 Gbps

# create a virtul switch
PS C:\Users\Administrator> New-VMSwitch -Name "Bridge01" -AllowManagementOS $True -NetAdapterName "Ethernet0"

# confirm
PS C:\Users\Administrator> Get-VMSwitch

Name     SwitchType NetAdapterInterfaceDescription
----     ---------- ------------------------------
Bridge01 External   Intel(R) 82574L Gigabit Network Connection

# create a directory for virtual machines
PS C:\Users\Administrator> mkdir E:\Virtual_Machine

# set VM name and others
PS C:\Users\Administrator> $ParentDir = 'E:\Virtual_Machine'
PS C:\Users\Administrator> $VMName = 'Win2k19'
PS C:\Users\Administrator> $Switch = 'Bridge01'

# create a virtual machine
PS C:\Users\Administrator> New-VM -Name $VMName `
-MemoryStartupBytes 8GB `
-Generation 2 `
-NewVHDPath "$ParentDir\$VMName\$VMName.vhdx" `
-NewVHDSizeBytes 50GB `
-Path "$ParentDir\$VMName" `
-SwitchName $Switch

Name    State CPUUsage(%) MemoryAssigned(M) Uptime   Status             Version
----    ----- ----------- ----------------- ------   ------             -------
Win2k19 Off   0           0                 00:00:00 Operating normally 9.0

# change vCPU count
PS C:\Users\Administrator> Set-VMProcessor $VMName -Count 4

# add SCSI controler
PS C:\Users\Administrator> Add-VMScsiController -VMName $VMName

# set install image
PS C:\Users\Administrator> Add-VMDvdDrive -VMName $VMName `
-ControllerNumber 1 `
-ControllerLocation 0 `
-Path 'C:\Users\Administrator\Documents\Win2019_EN-US_190906-2324.rs5.iso'

PS C:\Users\Administrator> $DVDDrive = Get-VMDvdDrive -VMName $VMName

# set virtual DVD first boot device
PS C:\Users\Administrator> Set-VMFirmware -VMName $VMName -FirstBootDevice $DVDDrive

# start the virtual machine
PS C:\Users\Administrator> Start-VM -Name $VMName

# after this, refer to [13] to install OS
Trên GUI
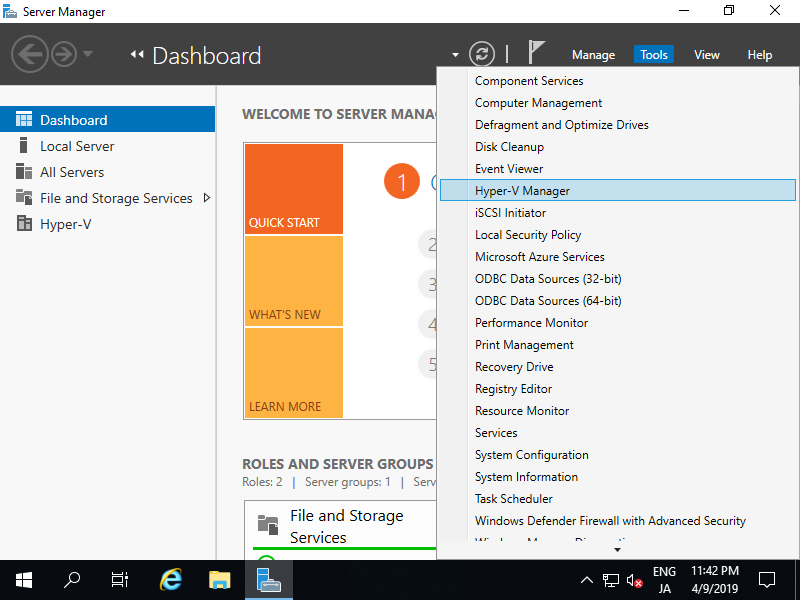
Mở Server Manager-Tools-Hyper-V Manager
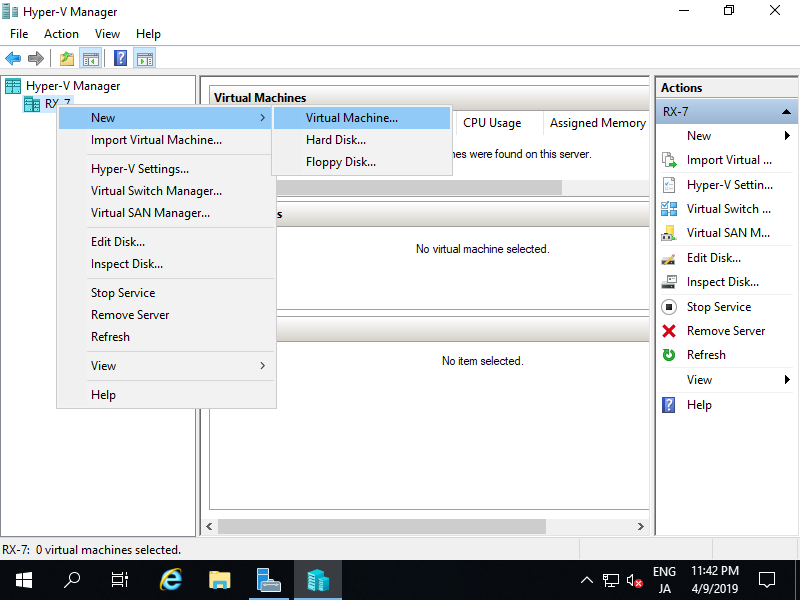
Chọn máy chủ thêm máy ảo, nhấn chuột phải chọn New–Virtual Machines
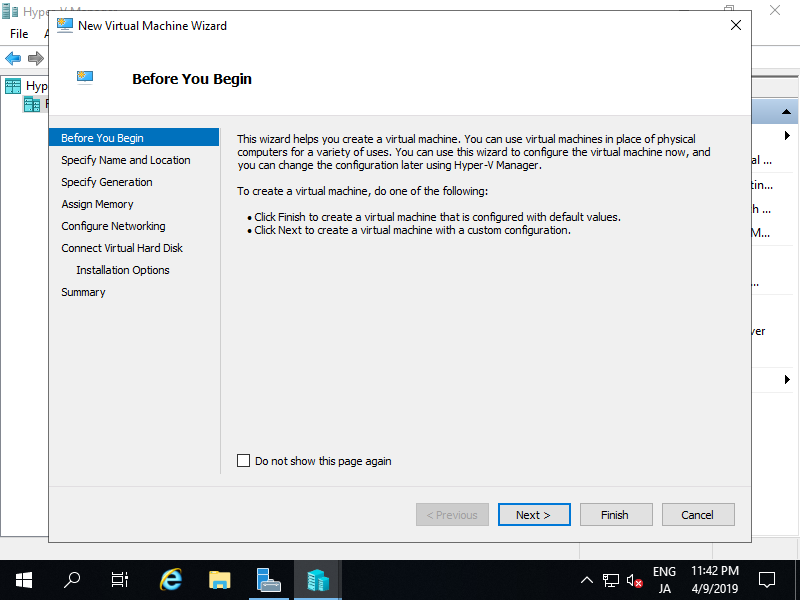
tiếp theo, chọn Next
Tại Specify Name and Location, nhập tên máy ảo

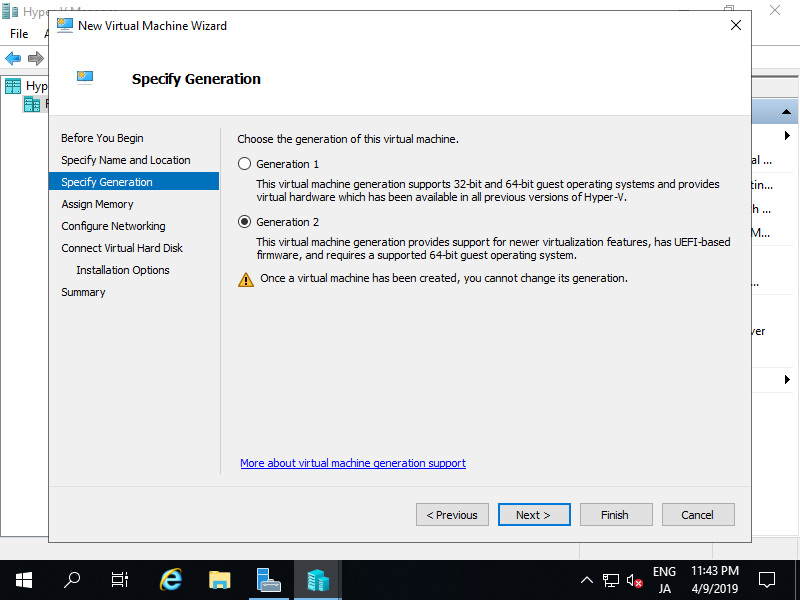
Tiếp theo, chọn thế hệ của máy ảo
Tại Assign Memory, gán bộ nhớ cho máy ảo.

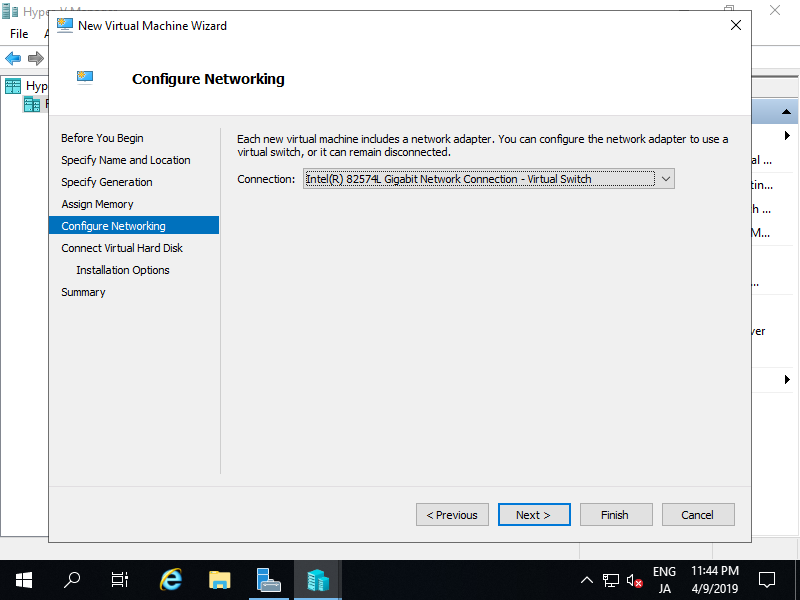
tiếp theo, chọn card mạng cho máy ảo
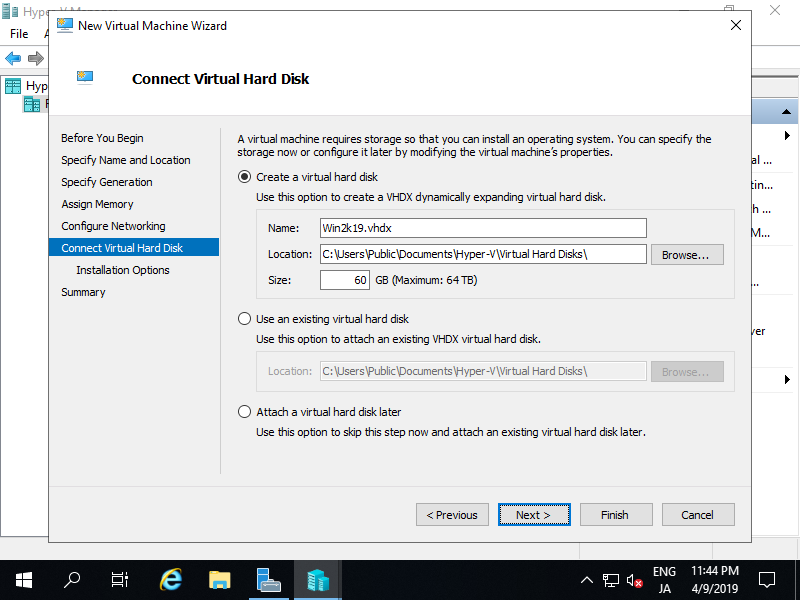
tiếp theo, cấu hình ổ đĩa cứng cho máy ảo
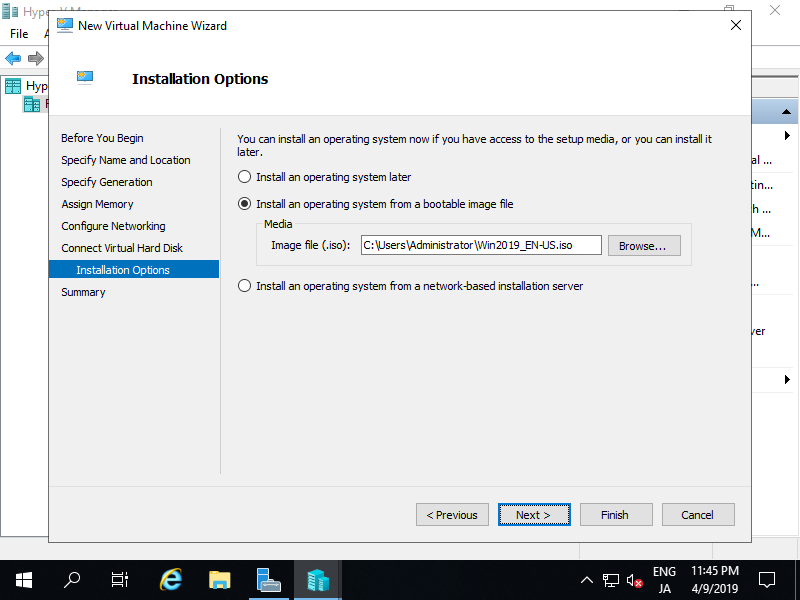
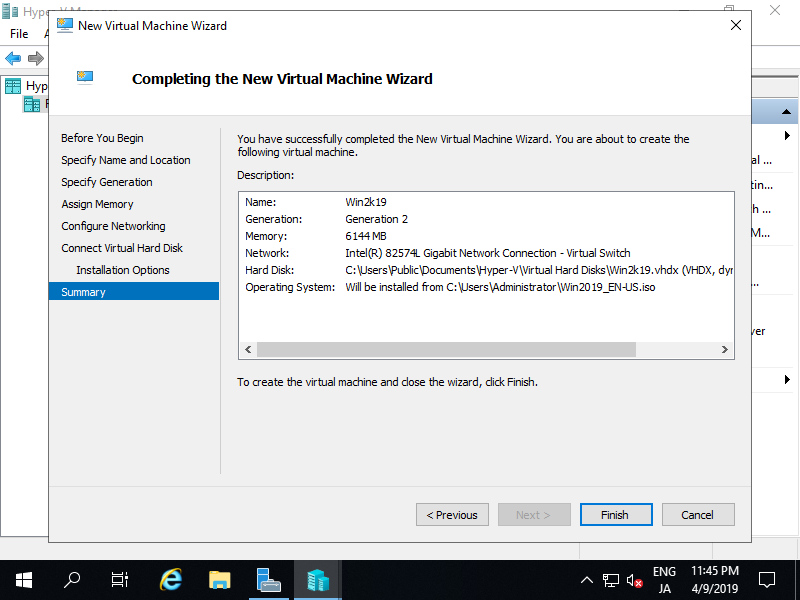
Chọn nguồn cài đặt
Nhấn Finish để tạo máy ảo
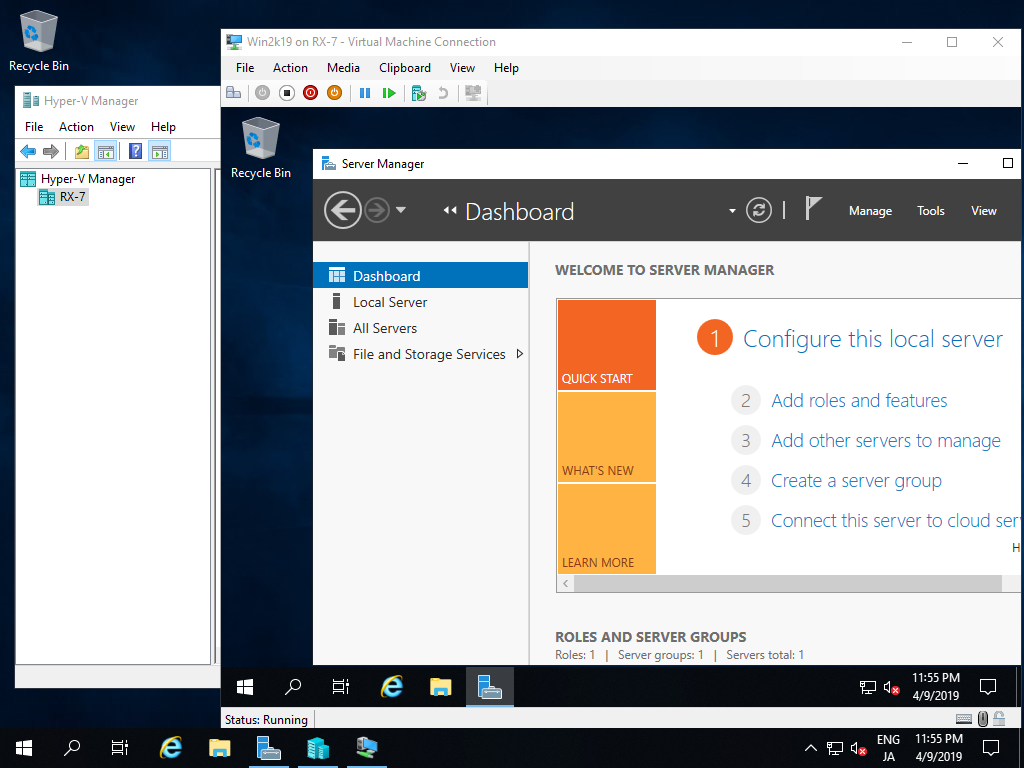
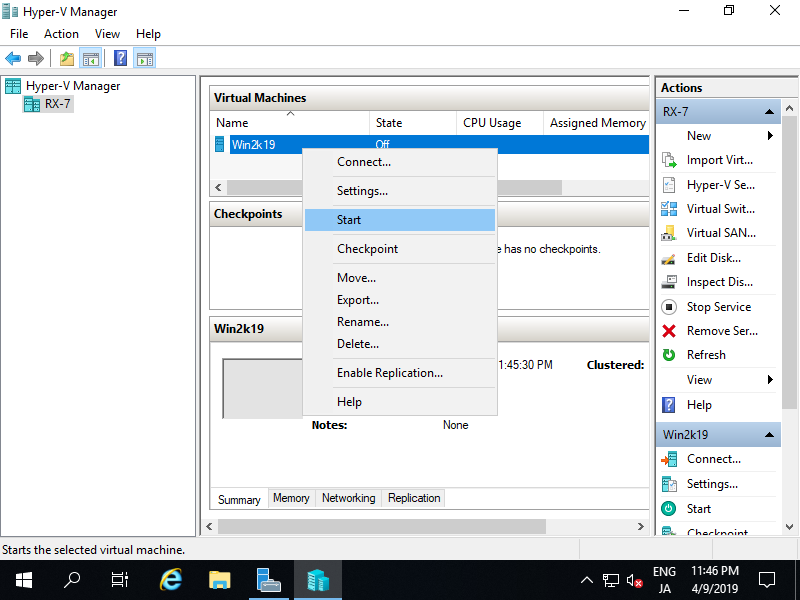
Máy ảo đã tạo thành công, để bật máy ảo, nhấn chuột phải vào máy ảo chọn Start
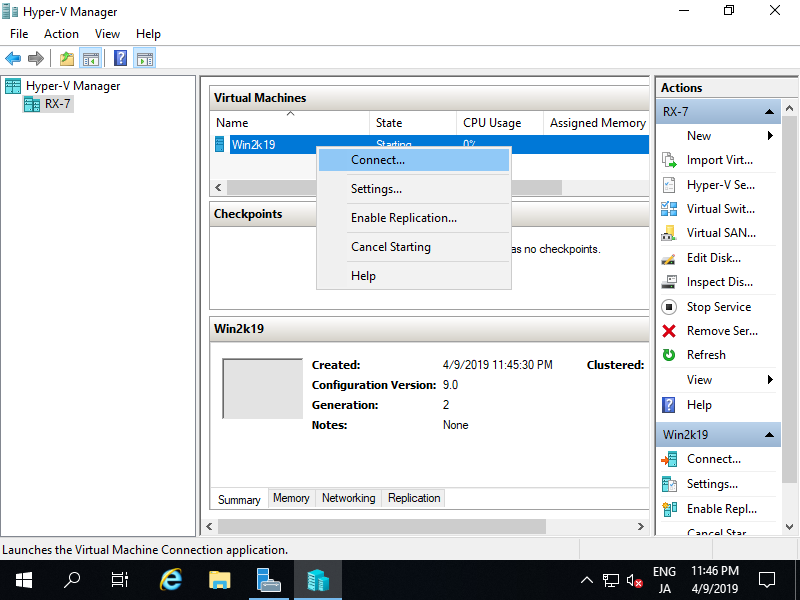
Để kết nối bảng điều khiển của máy ảo, nhấn chuột phải vào máy ảo chọn Connect…
Tiếp theo, cài đặt GuestOS như bình thường
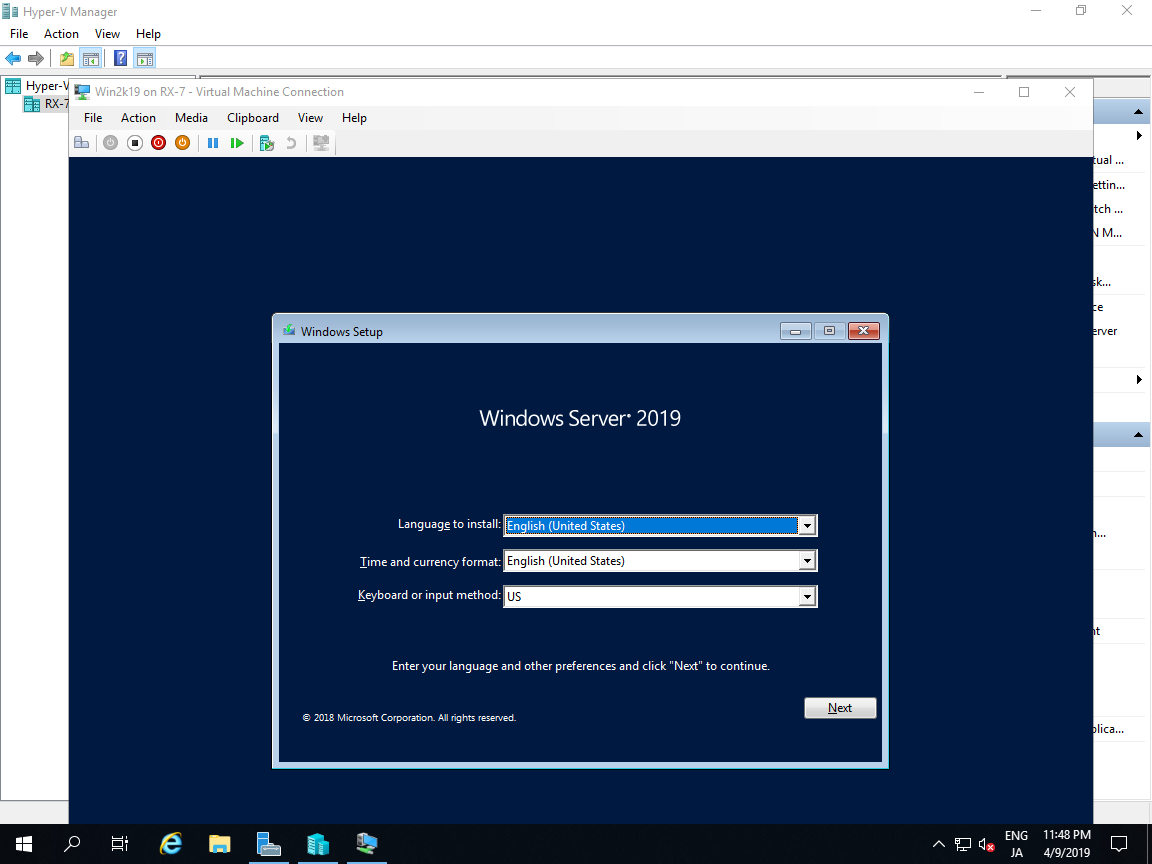
Quá trình cài đặt máy ảo đã hoàn thành